5.31.2010

Baby Scrapbook Pregnancy

Here's the FIRST PAGE I've completed for my baby scrapbook.  I'm planning on doing a "combo" book.  I had my first two kids close in age (13 months apart) so I thought it would be cool to do their baby book together.  It will include all the significant parts of their first year of life.  So, pregnancy, birth, first bath, holidays...etc.  Some pages will be their own page (like this one) and some I will combine pictures and make one page for both kiddos.  I'm pretty excited and hope it will be awesome.  Let me know if you have any cool pics on your blog of a baby album you did or any ideas in general...I would love to include them in this scrapbook. :)
The very first page in the scrapbook will probably be a nice portrait of the boys, but this will immediately follow it.  This is my pregnancy with my first son, Nehemiah. 

5.30.2010

Honey and Dijon Mustard Glazed Turkey

Ya, I know Thanksgiving is way over, but my parents gave us a turkey they had and didn't feel like cooking--so I did!!! It turned out sooo juicy and yummy.  We also made turkey sandwiches the next day with our leftover meat.  I started following a recipe and then got creative so here's the recipe I used including my spin:

Honey and Dijon Mustard Glazed Turkey:

Wash turkey and remove innards.  Pat dry with a paper towel.  Mix in a cereal-sized bowl the following ingredients: olive oil, kosher salt, honey, a stick of melted butter, Dijon mustard, Worcestershire sauce, McCormick's Crusting Blends (the garlic, lemon, and rosemary one), black pepper and lemon pepper.  (I just added about how much I thought would be good with more of the stuff we like.  It filled up a cereal bowl.)  Then, rub onto turkey lifting up the skin and putting directly on meat.  With the breast side up, cover the roasting pan loosely with foil, and bake at 325 degrees for about three hours or until internal thermometer reads 180 degrees (my fifteen pounder took three and a half hours).    Let cool for ten to fifteen minutes and carve.

5.28.2010

Feeling Inspired...

I have felt so inspired by all of the other crafters I started following this week!!  Thank you and here's what came of my inspiration (until two in the morning last night)!

The "ribbon" here is actually one of those twisty ties that holds toys or electronics in their box that I had saved and now re-purposed!


5.27.2010

Fall out Flip Book Tutorial

Here is a tutorial on how to make a falling out flip book.  It worked perfect here with the bridesmaids walking down the aisle because as you see the next page you are seeing the next thing that happens (or next girl coming).  This would also work well with another timeline event.  This would also be cute to make on its own as a memory book.
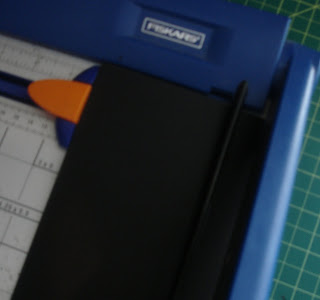
I first arranged the order I wanted the pictures to be seen in and set them aside (now you should know how many pictures you have to figure out the number of pages too).  The background paper, black here, is an 8 1/2" X 11" sheet cut length ways so that I could fit four pictures per half a sheet.  In the example there are nine pictures plus a title so I had a total of one and a quarter black sheets.  It's two pictures for every quarter page, or four pictures for every half a page.  You can choose any size of book you want, but I like this way because you maximize your paper usage and minimize where you see the paper connecting. 


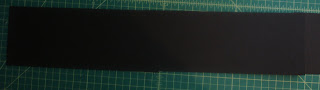
Let's connect all of the black sheets before adding any pictures.  Line up the short sides of the background paper and adhere to one another.  We want where the seams meet to be behind the picture and out of sight.  In the wedding example all you will see is folds because the seam is either hidden behind a picture or is at the back, where we aren't looking, when you flip open the book.  Put the left most paper edge on top of the next sheet with about a 3/4"-1" overlap and adhere.  Repeat this with as many pages you would like to add (if you have to add only a quarter a sheet at the end, you can just overlap the last page--and fyi you shouldn't need extra length).  
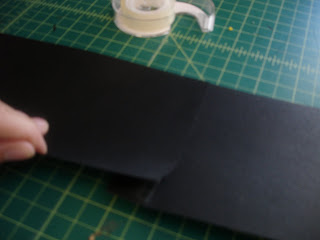
Now, we want to fold at the very first seam.  The fold should be in the back at the edge of the second paper.  Then, the long sheet should rest on top of the first sheet.  Next, fold the following page the same way so that it folds at the back seam on top of the second page.  You just repeat the first step until all of your seams are folded.  Remember to keep folding inward or to the left though.
Then we open it length ways again and starting at the right most side folding the pages in half inward.

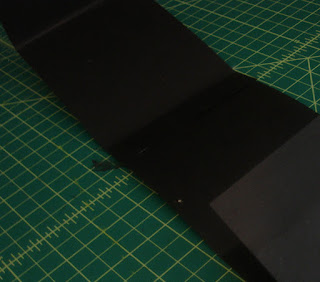
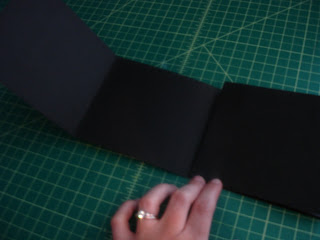
The last flap goes on top of the rest of the pages.
Now as you add your pictures make sure you do it in the right order as the flips fold out!  
 
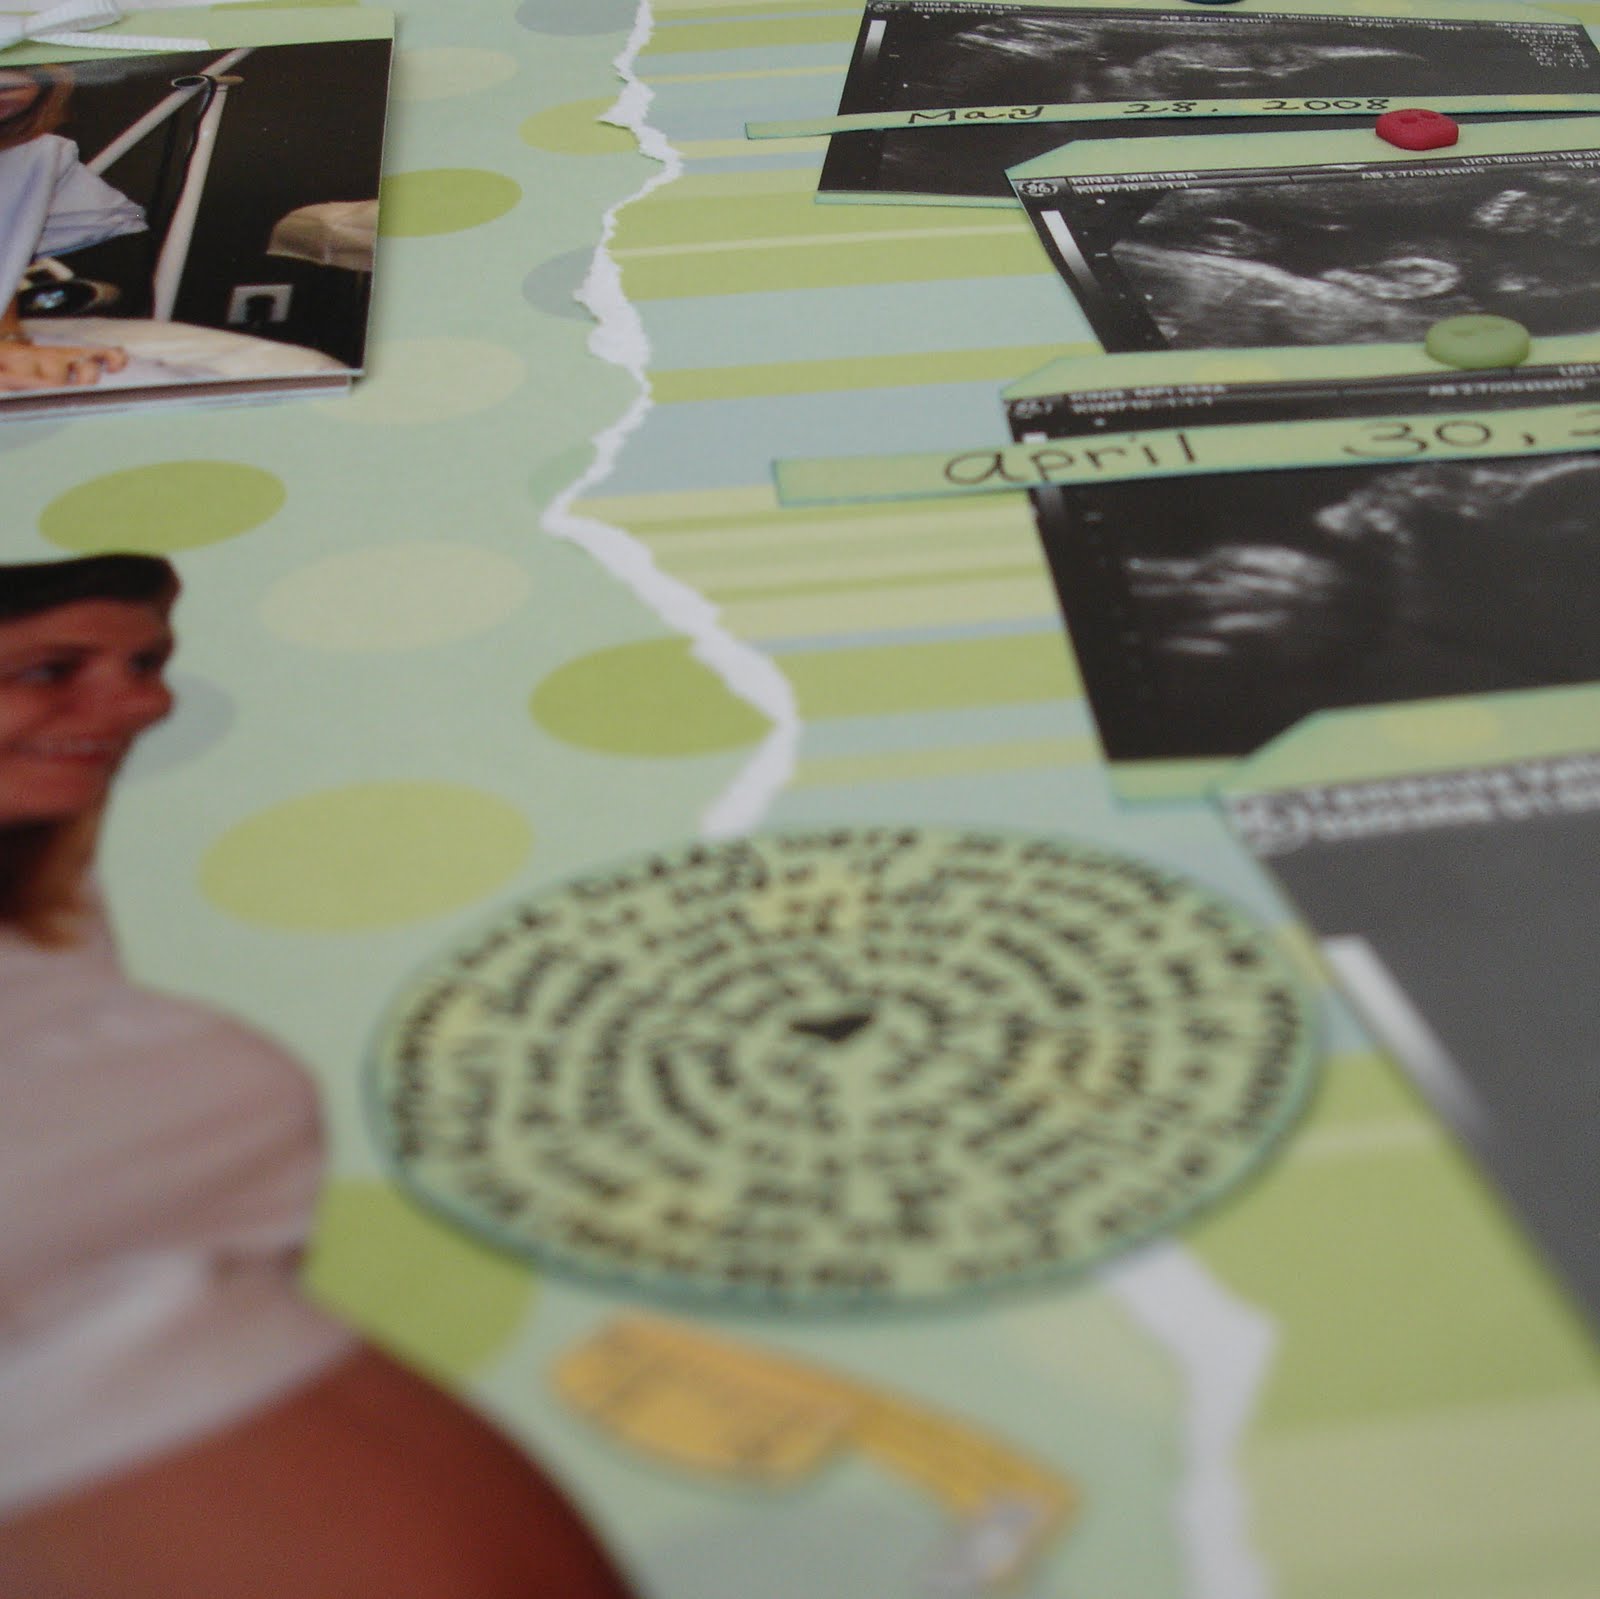
Then add decorative rub-ons, tabs, titles, embellishments, or whatever you fancy!  Tie the same elements into your scrapbook page!

Result is clean-line, but you got a lot more pictures/memories in that page!  And what a fun way to remember the order everyone entered in!  Please feel free to email or post with any questions!

More Seeds Popping Through!

I forgot to share yesterday about my veggies and how they'd been growing...I remembered the other thing I planted too!  So I have lettuce seeds, the bell peppers, and EGGPLANT!  Ha, well I checked and the lettuce seeds are doing so well.  I have a ton of little guys popping up!  Nothing on the peppers or eggplant yet, but it's still early since I planted them.  And since I am posting about those--I had to take a few more pics of my fountain because so many little guys are there!  Yea!  Success!  There is something so fulfilling about putting a seed in the ground, putting water and it, and something coming to life!  It's so crazy!  Oh, and I was reading about pruning herbs and I thought it was good info and wanted to share!!!  I guess you don't have to prune back your herbs, but they could eventually split and flop over if you don't.  It's best to do in the early spring when you start getting new growth and you can prune again after you start seeing flowering.  But--don't prune too late or you might encourage it to grow when it's trying to go dormant for the winter.  As far as how much to prune away: Remove dead or broken wood when you see the herb start to come back.  Shrubby herbs (I have rosemary, thyme, sage...) don't need it unless they've become overgrown.  Soft perennials (I have some oregano) gets cut back by half.  However, if you didn't cut back any of the flowers when it was in bloom (whoops!), cut it back up to a leafy point no more than 1/3 down the plant.  Hope you guys enjoy!
Lettuce Seeds:
Cute Shadow Huh?!

Soft and Chewy Peanut Butter Cookies


Soft and Chewy Peanut Butter Cookies


1/2 cup shortening (or butter flavored shortening) 
3/4 cup creamy peanut butter
1 1/4 cups firmly packed light brown sugar
3 tbsp milk
1 tbsp vanilla
1 egg
1 3/4 cups all purpose flour
3/4 tsp salt
3/4 tsp baking soda


Preheat oven to 375 degrees F. 


Combine shortening, peanut butter, brown sugar, milk and vanilla in large bowl. Beat with electric mixer at medium speed until well blended. Add egg. Beat just until blended.


Combine flour, salt and baking soda. Add to creamed mixture at low speed. Mix just until blended.


Drop by heaping teaspoonfuls (using a cookie scoop works great) 2 inches apart onto ungreased baking sheet. Flatten slightly in crisscross pattern with tines of fork.


Bake for 7 to 8 minutes, or until set and just beginning to brown. DO NOT OVERBAKE. Cool 2 minutes on baking sheet. Remove cookies to racks to cool completely.


Original from Amanda's Cookin'
http://www.amandascookin.com/2010/05/peanut-butter-cookies-soft-and-chewy.html

5.26.2010

Flower Update

 
Today we spent a morning outside and discovered that my flowers started to bud!  I counted almost 30 little sprouts!  I think there were probably three types that had germinated.  One type in particular I saw a lot of and the other two types maybe three or so.  Not sure which ones are sprouting since I planted six types!  I tried to show my son, Nehemiah (in picture), the little buds and explain they are flowers, but he just grabbed some dirt from the fountain and threw it across the yard.  He and I also had quite a snail adventure today too...To see more pictures click here.

5.25.2010

Wedding Tag

The white colored paper in the tag is actually the wrapping paper that I used to wrap the present. Made the gift tie together really well!

Heratige Scrapbook Page

I printed my husband's family tree (left) and mine (right) onto vellum paper.  I added our last names at the top, the family tree at the bottom and the word "heritage" combines the pages.  Then I put a few pictures of our grandparents and family (pics in sepia or black and white) underneath along with the really cool tree I found at JoAnns and some other little embellishments. Attached the vellum with brads on the corners and had to split open the scrapbook page cover. I love how you can just slightly see the pictures coming through! 

LinkWithin

Related Posts with Thumbnails