I am always trying to think of new, cute ways to add more pictures to my scrapbook pages. I love doing little books that open up and have pictures underneath, but I also want them to be decorated to match my page. So, I decided for a Christmas layout to add a flip book with a decorated edge. On the edge, I also wanted to incorporate the papers I was using. This is very easy to make when you have the directions in front of you, so I hope you find this tutorial helpful and inspirational!
Step #1: Cut the cardstock you want as the background color. I've chosen an 8.5"X11" confetti white. You can chose to have your flip book flip open sideways or up and down. The picture above is a sideways flip book and if you scroll down, you will see pictures of an up/down flip book.
To do a
sideways flip book you need to cut your cardstock so that we end up with four 4"X5.5" pieces. So first cut 1/2" off the width
(so you now have an 8"X11" sheet), then cut the cardstock lengthwise in half (
result: two 4"X11" pieces) and then turn and cut in half again (
result: four 4"X5.5" pieces).
To do an
up/down flip book you will need to cut your cardstock so that we end up with four 4.25"X5" pieces. So first cut 1" off the length (
so you now have an 8.5"X10" sheet), then cut the cardstock lengthwise in half (
result: two 4.25"X10" pieces) and then turn and cut in half again (
result: four 4.25"X5" pieces).
Continue this step until you have enough for all of the pictures you want to use in the flip book. An 8.5"X11" sheet makes four squares and each square holds two pictures, so one sheet is enough for eight pictures. (Example: you want to use 12 pictures in your flip book. You need to make 6 squares.)
Step#2: Cut your decorative edge using a fun scissor, tool, or a machine that cuts edges. For the
sideways book, cut
one of the edges that is 4" wide. Do this for each square. For the
up/down book, cut
one of the edges that is 5" wide. Do this for each square. Here is a picture of the up/down book edging:
Step #3: Add your pictures.
For the
sideways book you can cut the pictures if you want to have more space on your decorative edge, but it's not necessary. If you do want to cut them, cut the side that is 4" wide. Then adhere the pictures to the cardstock. Line the picture up with the edge of the cardstock that isn't trimmed with the decorative edging. You will be flipping through the book when looking at the completed pictures, so you need to make sure when pasting that the pictures won't be upside down.
For the
up/down book we need to cut 1/4" off the height of the picture to add more space for our decorative edge. Your 4"X5" picture should become 3.75"X5". You can cut off more or less depending on how big you want your edge to be. Then adhere the pictures to the cardstock. Line the picture up with the edge of the cardstock that isn't trimmed with the decorative edging. You will be flipping through the book when looking at the completed pictures, so you need to make sure when pasting that the pictures won't be upside down.
Step #4: Crease your edges.
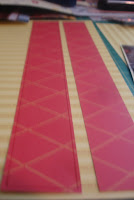
Step #5: Adhere coordinating paper to the decorative edge. This is only done to the "front" of the flip book. Then cut along the edge where you had your pretty trim, using the same scissors or tool you used on the cardstock.
Step#6: Connect the squares. Punch two holes in same spot on all of your edges. (To make them even, I stacked mine in the order I wanted, then I punched hard through all of them at once leaving a score on each edge. Then I went back and punched each hole individually.)
Adhere each square to the next by putting adhesive on each edge. Then, tie a coordinating ribbon through the holes for extra strength and for cute factor.
Step #7: Adhere to your scrapbook layout by putting adhesive on the decorative edge.
There it is! So fun and so many more pictures to see! Yea!
Click here to see another flip book tutorial or
click here to this scrapbook page completed.


.JPG)
-1.JPG)
.JPG)


